
Here is how I made the toile for my white blouse

To create my blouse I traced around the bodice block and sleeve block.

For the front block I moved the shoulder dart to the bust using the block as a guide.
I also added a button stand of 3cm and added that twice, I then added 1cm either side of the centre front seam.


I then added 1cm SA and cut this out.

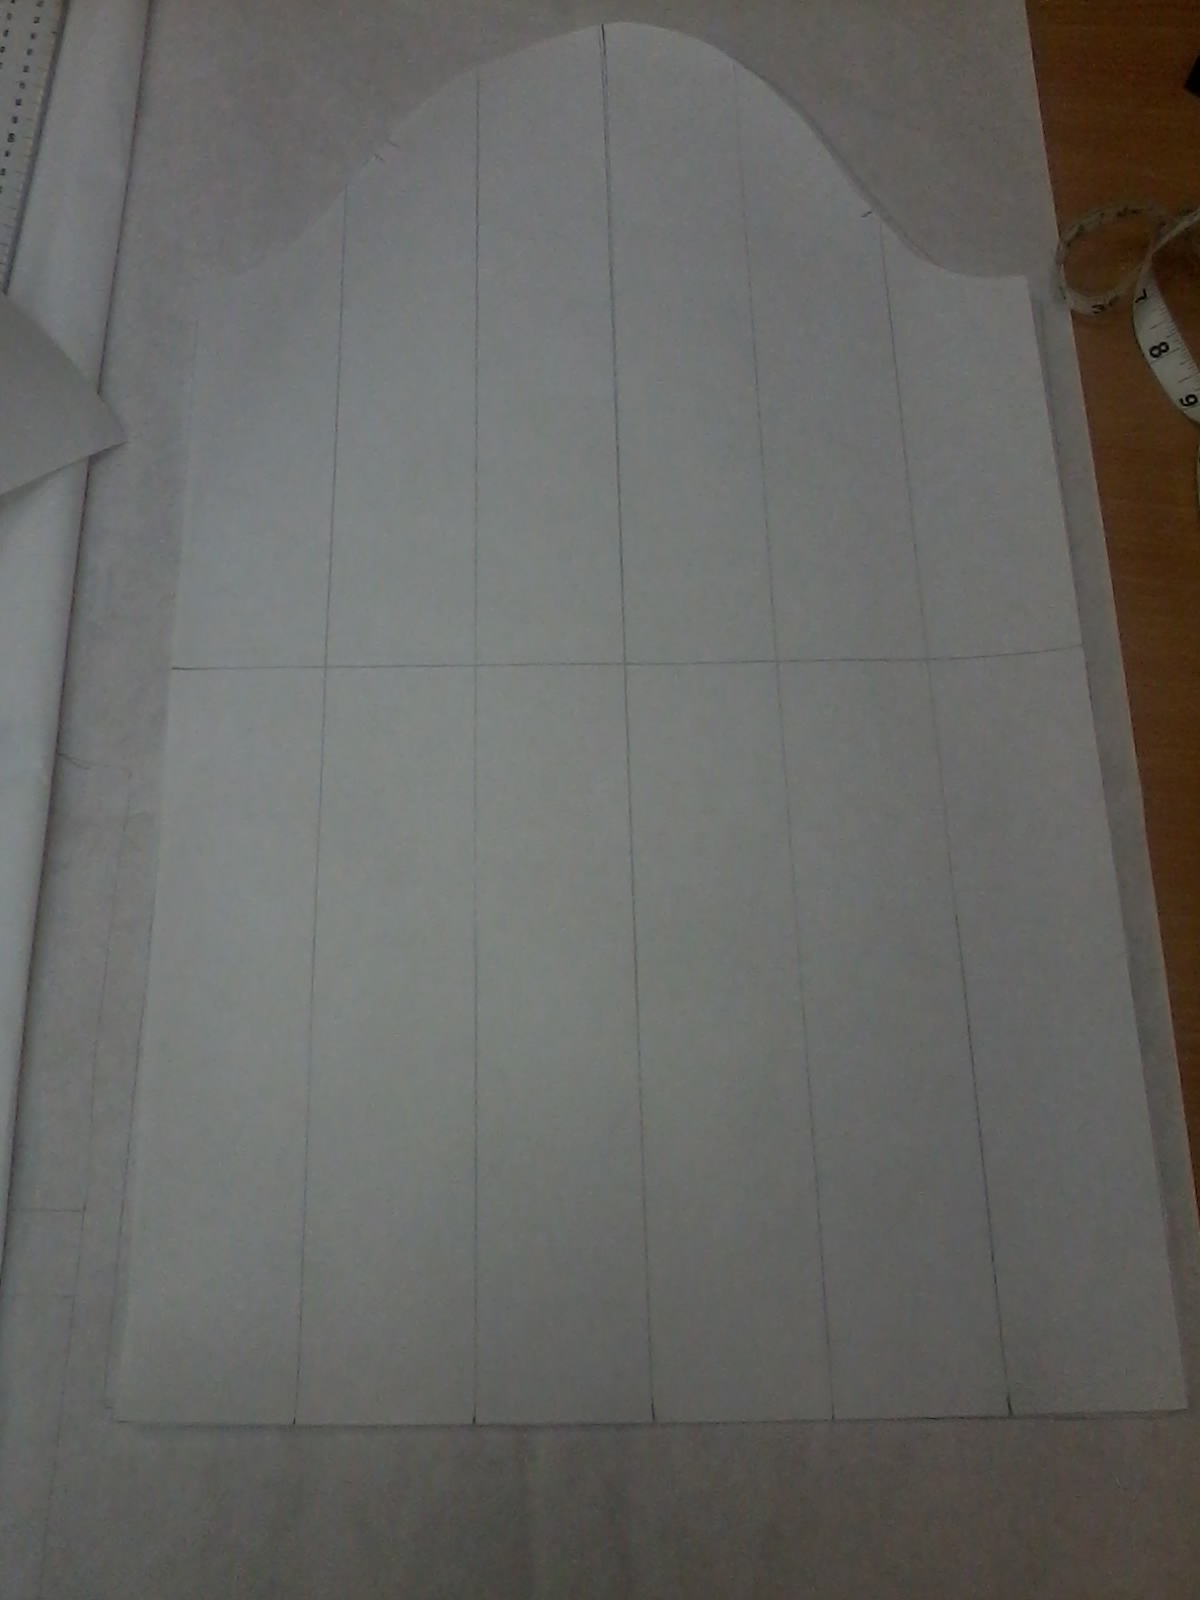
to the back I removed the shoulder dart by taking the same measurement of the dart off the side. I also extended this a little to about 45cm from the shoulder.

I then drew in the yoke line and drew an even curve to the top bust line, I also left 1cm by the arm whole so it was easier to attach to the yoke

I also extended the length to about 55cm from the shoulder line.

For the sleeve I divided this evenly into 6 sections and slashed and spread however I measured a comfortable measurement around the wrist and taped the sleeve edge to this measurement.


For the cuff I took the wrist measurement and created a rectangle about 5cm wide and added a 4cm button stand. I then added a 1cm SA and cut this out.

For the collar I measured one side of the back section of the neck on a mannequin and Drew a deep line this distance, I then measured one half of the front and marked this on. I then measured how wide I wanted my collar and then drew a rectangle I then lifted the top corner and adjusted my point, I also lifted the bottom edge and drew a cut on the fold at the centre back.

Next I drew a 1cm SA and cut this out.


Next I pinned my pattern pieces down and cut them out of my fabric.

I then sewed bias binding to the curve on the back.

I then sandwiched the back piece in between the yoke pieces.

I then folded the button stand over 3 times according to my notches and top stitched them down.


Next I sewed the front and back together at the shoulder so that the seams were tucked in together, to do this i made sure the front was sandwiched in between the yokes, i then turned this out and top stitched.


next I attached the sleeve to the shoulders and then sewed down the side seam from the top of the sleeve to the hem, however I left about 3cm at the bottom of the hem as I wanted a step hem and a small slit at the seam, I then repeated this on the other side.

I then sewed the collar pieces together, cut off the corners and bagged it out.

I then sewed in a notch to attach the collar and sewed one side of the collar to the neck like.


I then folded the other side over and folded the seam up so it was hidden.

I then top stitched so the seam was hidden.

I then repeated this step with my cuffs however I made sure they were facing opposite ways.


After I sewed them I realised that The button stand were facing the wrong way, I will sew these the opposite way on my final.
Thanks for reading!!
Jenny xxx


