For my latest project in college I am making a shirt, the shirt includes a yoke, cuffs, a collar and bishop sleeves. Heres how I drafted the patterns:
First I began by drawing around shirt blocks, the block include the front shirt piece, back shirt piece, the sleeve and the cuff. The picture above is my first draft which wont be cut into or adapted.
Next I traced over the yoke on its own first then the back shirt piece without the yoke and then the front shirt piece and then the cuff I also added a 1.5cm seam allowance to all of these.
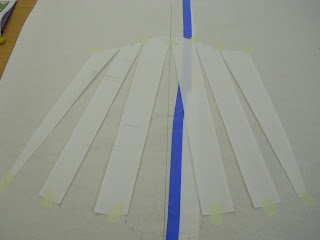
I then traced over the sleeve and devided it into six sections and I drew a line from the top to the bottom of the pattern.
After this I cut the pattern piece out and I slashed and spread the sleeve, the middle pieces I spread by 8 cm. I then spread the other two pieces on the right by 8cm and 4cm on the other side. After this I traced over the adapted pattern. To create the bishop sleeve we didnt cut any of the length off, as normally to create a sleeve you cut some of the length on the bottom to leave space for the cuff.
This is what the bishop sleeve will look like when finished.

After this I created a pocket pattern by placing my hand on the paper and marking off the corners of my hand and then I matched the lined, I also used dashed lined to mark the curve.
 Finally I made the collar and the collar stand, to do this I measured the neckline on my first draft to see how long the collar will be, I then decided on a depth for my collar stand which was 4cm. I also lifted the top right point higher up for the front of the collar and for the collar stand i lifted the bottom line at the front by 0.5cm and curved it to match the top line of the collar stand.
 I then devided the collar into four equal sections and traced around the collar and the collar stand, I slashed and overlapped the collar stand by 0.5cm, then I slashed and spread the collar by 0.5cm so that it will fit over the neck. The last step was to trace over these and add a 1.5cm seam allowance.
Thanks for reading,I hope this post was usefull.
Jenny xxx


1 comment:
nice!
Post a Comment