Thursday, 1 December 2011

'Le Ballon Rouge'


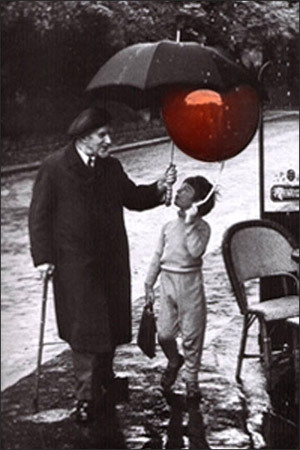
On Tuesday we watched short film by Albert Lamorisse called 'Le Ballon Rouge' its about a small boy and an abnormally bright red balloon.

I really enjoyed watching this movie and it really showed how the balloon seemed to be his only friend.

'Le Ballon Rouge' has also inspired many adverts, artists , music videos etc...

Here are some examples of work inspired by 'Le ballon Rouge'


Banksy


Dior Miss Cherie


The story line in Mark Ronson & The Business Intl - The Bike Song, is highly influenced by 'Le Ballon Rouge' if you've watched them both they you will definitely know what I mean.


Thanks for reading, I hope you liked this post.

Jenny xxx

Friday, 25 November 2011

Berry Bow Nails

Last week (I think) I bought a Barry M nail paint 'Berry Icecream' I really love the colour and it compliments my skin really well. I've wanted to get the Berry Ice cream ever since I got the Strawberry Ice cream but at roughly £5 a bottle I wasn't all that willing, but thankfully the price went down to £2.99 *happy face*


As its me I don't just paint my nails, I decorate them and because I'm not left handed it took me about two hours to paint my nails, but I guess it was worth it. To decorate them I just used the wooden sticks you usually get in nail sets, white nail paint and the Strawberry Ice cream paint to add some colour.

Because of my stupid camera today was the first day it decided to take some decent pictures or my nails, there a little chipped and some of the pearls fell of, but they lasted a week of wear and tear.

Here are the pictures, please excuse my awful skin (due to eczema)
 Thanks for reading this post, I hope you liked my nails as you can see my right hand is much better than my left. How do you guys normally paint your nails? any tips or questions, feel free to comment.

Jenny xxx


Wednesday, 16 November 2011

Holy Moly

This post is a bit late again but this is the first chance I have had to do this post.
Last week in pattern cutting we made button hole using this fancy machine that can sew letters and pretty patterns.

It's super expensive so I was a little worried about breaking it or even getting it dirty!

The actual sewing part was really easy all we really had to was punch in some settings and press the treadle and there we go a button hole.

Here are some buttons I found that i thought were pretty cute.


Thanks for reading, I hope you liked this post. I'm now very tempted to make this bracelet.
What do you think?? have you ever made any jewellery using buttons?
20 to Make: Button Jewellery

Tuesday, 15 November 2011

The September Issue


Today in lesson we watched 'The September Issue' the documentary is about he 'most power full woman in the USA - Vogue editor-in-chief Anna Wintour. 


The documentary follows the preparations for 2007 fall-fashion issue, which is the biggest issue to date. The amount of work and money that goes into one issue 
From this I have learned that I definitely don't want to work for a fashion magazine!!

but i have taken a lot from this and I will definitely be more organized and do much more planning for my work in the future.

Grace Coddington, the creative director for vogue has definitely inspired me to work harder to achieve my goals. she was previously a model for vogue and went on to work for British vogue and then moved on to America.

Her work is amazing you can see some at
http://models.com/people/grace-coddington


Monday, 14 November 2011

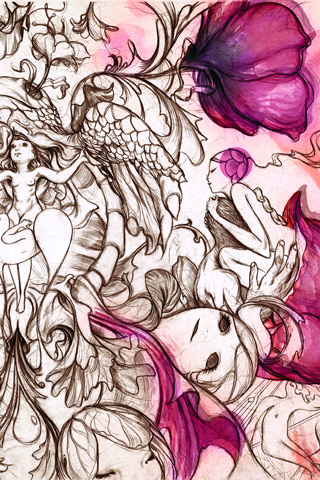
My Favorite Fashion Illustrators

One of our tasks has been to research some fashion illustrators off a given timeline and find some of our own.

I never really like doing research but I really enjoyed recreating some of their work, unfortunately I don't have any pictures from my sketch book to show you just yet as its being marked.


Here's a list of my top 5 favorite fashion illustrators I researched :

5- Stina persson


4 - Kime Buzzelli


3 - James Jean


2 - David Downton


1 - Rik Lee


Rik lee is definitely my favorite illustrator i just love the style of his work, words cant really describe how much I love his work. Some of his illustrations are like all of my favorite things put together.

Thanks for reading, I hope you liked this post and who's your favorite illustrator or artist?

Jenny xxx

Friday, 28 October 2011

Zip Me Up!

Today's post is about my last pattern cutting lesson, I know it was about two weeks ago but I've had so much work I had to hold it back until now I'll update on that soon.

So in our last lesson we sewed zips to two pieces of fabric; I got excited about pattern cutting, like I do every lesson but this time the spoon head inside me came out and I made a few silly mistakes.

(sorry about the pictures, my camera isn't all that good and I litterally had to take them in pitch black for the stiches to show)


The first zip we made was a centred zip. You will see centred zips on things like the side of your skirt. The mistake I made on this one was at the very beginning.


Incase you cant tell I sewed the zip on backwards, unfortunately I didn't realise until I had almost finished so it was too late to go back. I may have to go back and do this again but for now I have annotated my mistake.


The second zip was a lapped zip. Me and my teacher were very pleased with how neat and straight I sewed the top line. However I didn't catch one of the layers, as you can see in the picture on the right, so I had to do it again, and I will  finish it next Thursday. next time we will also be sewing invisible zips (not actually invisible).


Thanks for reading this post I hope you liked it, any of you worked with zips before? and how did it go for you?

Sunday, 9 October 2011

Fancy a Skirt

Its been a while since my last post as college has been so busy. But I am getting much better at sewing and drawing.
We have pattern cutting days every Thursday, which is my favorite day, this Thursday we made skirt blocks, a pattern and a skirt (toile). I know its not the prettiest skirt but we only used a bed sheet.


As for my still life drawing, well I'll let you be the judge of that.


As for future blog posts I'm not quite sure what will be next but as soon as I get some material I will be doing a DIY post. I'm torn between these 2. I have a feeling I will make them both at some point but I think I might let you guy choose which you would like first.

 
            Crinkle Long Skirt                                             Vs                          Sleevless Maxi Dress

   I hope you liked this post let me know which one you would like to see first.

Jenny xxx

Friday, 23 September 2011

DIY How to be a cat!


I love cats (although I'm allergic) and this is and impossible goal, I can't show you to actually be a cat but I can show you how to resemble one.
In case you haven't noticed this DIY post is how to make cat ears, there super cute and very comfortable. These cat ears will be great for Halloween, costume party's and anime conventions.
  • Get your self some faux fur from your local fabric shop, remember faux fur can be quite expensive so if you only plan on making one or two pairs then get no more than half a meter.  
  • You will also need some lining fabric, any colour of your choice.
  • (optional) Decorations of your choice (bows, ribbons, beads etc.)
  • fabric scissors (normal scissors will get blunt if used on fabric too often)
  • Needle and matching thread to the FUR
  • Super glue/hot glue gun
  • Head band or hair clips
  • Thick paper or thin card
If you want your ears to look more realistic then get fur that matches your hair colour and a peachy pink lining fabric. This may seem very long winded, they are very easy to make there just hard to explain.

Help - In case you get confused later on you can refer back to this:
  • there are two sides to the ears Front(the side with the lining) Back(the side with the fur) 
  • the top of the ears are the tips
  • the bottom, the same end with the seam in step 6

Step 1

Get your card or paper and draw out a rounded triangle shape for the cat ear similar to the picture below, remember to make this a little bigger than you want your ear so that you have enough seam allowance, this will be your pattern.
I would advise labeling the top for later on. Make as many as you want i made 4 for each piece of fabric.

Step 2

This part is hard to describe so read carefully and pay attention to the picture. Just like a cats ear the fur should be moving to tip, see which direction your fur is going and place the fabric fur side down on your surface with the fur in the direction of the big red arrow. Then place the pattern on the top and pin them together.

So the top of the pattern should be in the same direction of the fur.
Do exactly the same for the lining fabric
Step 3

Next cut out the fur and lining around the pattern, you will need 2 of these for each pair of ears. They don't have to be perfect.


 Step 4

Place the fur and the lining fabric rite sides together, pin and sew along the edges, you only need to do a simple stitch and you can go round twice if you want your ear to be extra secure.


Step 5

Turn the ears inside out and gently pull the loose fur one the edges out of the seam, you need to do this because when you turn your ear inside out the fur will be tucked in the seam and it wont look like a real cat ear. 
Once you've done this the fur should come out past the seam. 


Step 6

Fold the ear in half and then sew along the bottom (along the res line), make sure u sew both the materials other wise the lining will be loose and move about, and that you leave some material below the stitch so it will be easier to glue to headbands etc.
when you have sewed them then open the ear out into a ear shape,  you can glue the sides together if you want it to keep its shape permanently (you will know what I mean when you get to this point)

 
Step 7

Next you can glue the ears to a head band or hair clips, if you can think of anything else you would rather put these on then please do so.
If your putting these on a head band then you can do this how ever you want, to do it my way then leave a thumbs distance at the end of the band and glue up to the length of the ear and place in any direction you wish.

To put these on clips just glue around the top of the clip and stick it to the bottom of the ear, make sure you put the ears on you head first and figure out how you want them to look. I wanted mine facing down so I put my clip on my ear facing left to right and the opposite for the other ear.


 Step 8

This step is optional, to make your ears look cuter them you can tie some bows together and glue them to the bottom of the ear (as on the pictures below) this way when you wear them they look super cute like a little kitty.


I tried tying the ribbon around the ear but that didn't turn out so well so I just decided to glue the ribbons to the bottom of the ear.


Step 9
Finally were at the end the last step is to ENJOY!! wear these at a party, to a festival or convention, at home, maybe not to town or going shopping.
Put them on, take photo's and add special effects , draw on a nose and whiskers(I forgot), show off to your friends that you have awesome cat ears and they don't. Do what ever you like with these! Sorry about the pictures I took them at night and I had to use flash.


Thanks for reading, I hope you enjoyed this tutorial. If you tried this then do let me know how it goes, if you need any tips or help then feel free to ask.

Jenny xxx

Related Posts Plugin for WordPress, Blogger...